welcome to creating calm chaos. please make yourself at home

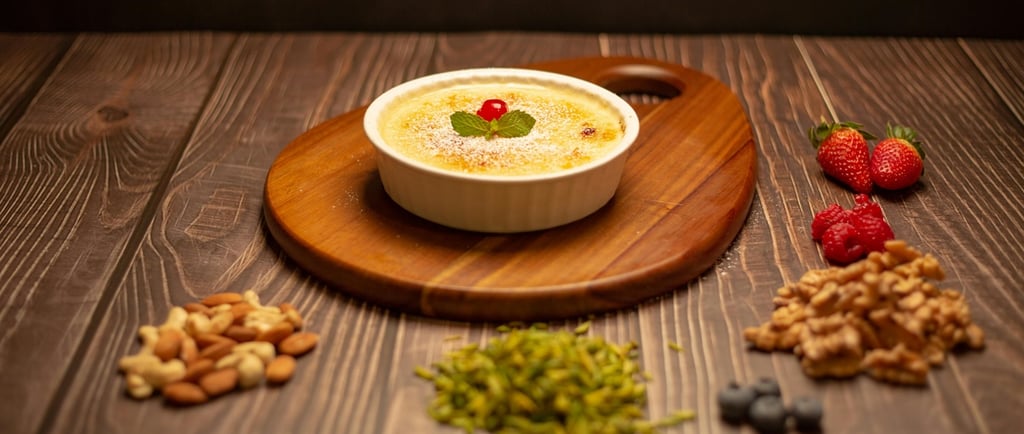
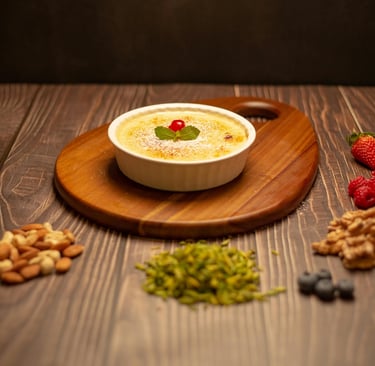
Baked Vanilla Custard for Elderly Parents
Silky smooth, gently sweet and utterly comforting
5/16/20264 min read
If there is one dessert that speaks directly to the soul of an elderly parent, it's a proper baked custard.
It's one of those recipes that feels like pure comfort from the very first spoonful. Silky smooth, gently sweet and warm — it melts in the mouth without any chewing effort at all. Most elderly parents grew up with baked custard and there's a lovely familiarity about it that goes beyond just the taste.
It's also one of the most nourishing desserts you can make. Eggs, milk and cream provide protein, calcium and healthy fats in a form that is incredibly gentle and easy for an ageing digestive system to handle.
Mum's eyes absolutely light up when I make this one. It's become one of her most requested treats and honestly I completely understand why.
Why This Recipe Works for Elderly Parents
Completely smooth texture - silky and soft with absolutely nothing to chew
Easy to swallow - ideal for anyone with swallowing difficulties
Highly nourishing - eggs and cream provide excellent protein and healthy fats
Gentle on the stomach - simple wholesome ingredients, nothing harsh or heavy
Familiar and comforting - most elderly parents have a lifelong love of baked custard
Naturally calorie dense - perfect for elderly parents who struggle to maintain their weight
Serves well warm or cold - versatile enough for any time of day
Recipe Details
Serves: 6 Prep time: 10 minutes Cook time: 45 minutes Chill time: 1 hour (optional but lovely served cold) Freeze: Not recommended - custard does not freeze well
Ingredients
600ml full cream milk
300ml thickened cream
4 large eggs plus 2 egg yolks
80g caster sugar
2 tsp pure vanilla extract or 1 vanilla bean, seeds scraped
Pinch of nutmeg for the top
Boiling water for the water bath
Method
Step 1 - Preheat your oven Preheat your oven to 160°C (140°C fan forced). Place a large deep baking dish or roasting pan in the oven - this will be your water bath. Put the kettle on to boil.
Step 2 - Warm the milk and cream Combine the milk and cream in a medium saucepan over low-medium heat. Warm gently until steaming but do not allow to boil. Remove from heat and add the vanilla extract or vanilla bean seeds. Allow to cool slightly for 5 minutes.
Step 3 - Whisk the eggs and sugar In a large bowl whisk together the eggs, egg yolks and caster sugar until well combined and slightly pale - about 2 minutes. You want them well mixed but not foamy as foam creates bubbles in the final custard.
Step 4 - Combine Very slowly pour the warm milk and cream mixture into the egg mixture, whisking gently and constantly as you pour. Go slowly - if you add the hot liquid too fast you will scramble the eggs. Strain the mixture through a fine sieve into a large jug. This removes any lumps and gives you a perfectly smooth custard.
Step 5 - Pour into dishes Pour the custard mixture evenly into 6 individual ramekins or one large baking dish (approximately 1.5 litre capacity). Sprinkle a tiny pinch of nutmeg over the top of each one.
Step 6 - Water bath Carefully place the ramekins or baking dish into the hot baking dish already in the oven. Pour boiling water into the outer dish until it comes halfway up the sides of the ramekins or baking dish. The water bath ensures the custard cooks gently and evenly without curdling or cracking.
Step 7 - Bake Bake for 35–45 minutes for individual ramekins or 50–60 minutes for a large dish. The custard is ready when the edges are set but the centre still has a very slight wobble when you gently shake the dish - it will continue to set as it cools. Do not overbake or the custard will become rubbery and grainy.
Step 8 - Cool and serve Carefully remove the ramekins from the water bath. Allow to cool to room temperature then refrigerate for at least 1 hour before serving cold, or serve warm immediately from the oven.
Serving Suggestions
Serve as is - it's perfect on its own
A small spoonful of stewed fruit alongside is beautiful
A tiny drizzle of honey on top adds a lovely touch
Dust with a little extra nutmeg or cinnamon just before serving
Storage
Refrigerator: Cover each ramekin with plastic wrap and refrigerate for up to 3 days. Serve cold straight from the fridge or allow to come to room temperature for 20 minutes first.
Freezer: Not recommended. Custard separates and becomes watery when frozen and thawed.
Kim's Tips
💕 The water bath is non-negotiable - I know it feels like an extra step but it's what gives baked custard its silky smooth texture. Without it the custard will be rubbery and full of bubbles. It takes 30 seconds to set up and makes all the difference.
💕 Strain the mixture - this step removes any stringy egg bits and gives you a perfectly smooth custard. Don't skip it — it's worth the extra 30 seconds.
💕 Don't overbake - the centre should still wobble slightly when you take it out of the oven. It looks underdone but it will set beautifully as it cools. Overbaked custard is grainy and rubbery.
💕 Individual ramekins are easier to serve - one ramekin per person means no portioning required. They go straight from fridge to table. I've linked my favourite ramekin set on my Amazon storefront.
💕 Make ahead - this is a wonderful make ahead dessert. Make it the day before and refrigerate overnight. It's actually even better the next day when it has had time to fully set and the flavours have deepened.
💕 Real vanilla makes a difference - pure vanilla extract or a real vanilla bean gives this custard a beautiful depth of flavour. Imitation vanilla works but real vanilla is noticeably better in a recipe this simple.
What You'll Need
Individual ramekins make baking and serving this custard so much easier. I've linked my favourite oven safe ramekin set and a good quality fine mesh strainer on my Amazon storefront.
👉 Shop my kitchen recommendations on Amazon
More Recipes
👈 Back to the full recipe collection
Disclosure: As an Amazon Associate, I may earn a commission from qualifying purchases at no extra cost to you. All opinions are my own.